Hi everyone, this is my first tutorial on how to relight in Nuke with Vray. I decided to write this guide because I met a lot of problems to make this new compositing feature work properly. In this tutorial, I’m using 3D Studio Max 2012 with Vray 2.0 SP1 and Nuke 6.2v2.
Leaving all settings to default in 3DS Max e Vray, in the Vray rollout go to render elements and add two times a VraySamplerInfo pass. Then rename each one in Vray SamplerPoint and VraySamplerNormal, by going below in the selected Element Parameters section (you can rename as you like). Select VraySamplerNormal, scroll down to the bottom, and set the type to Normal Vector. You don’t need to change VraySamplerPoint pass because the default setting type is just set right to Point.
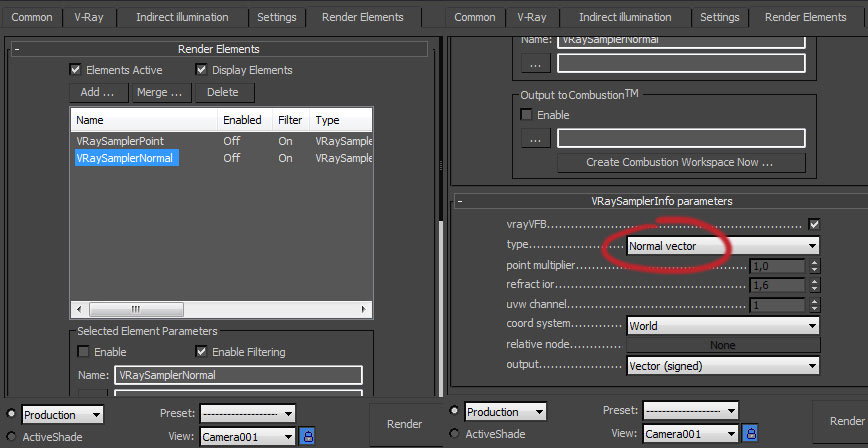
The common error at this step is to use VrayNormal pass because Relight needs Normal to compute point clouds, but VrayNormal are relative to the camera and we need Normal that is absolute to world coordinates. VraySamplerInfo can do this for us by choosing Normal Vectors and leaving to default coordinates system to World.
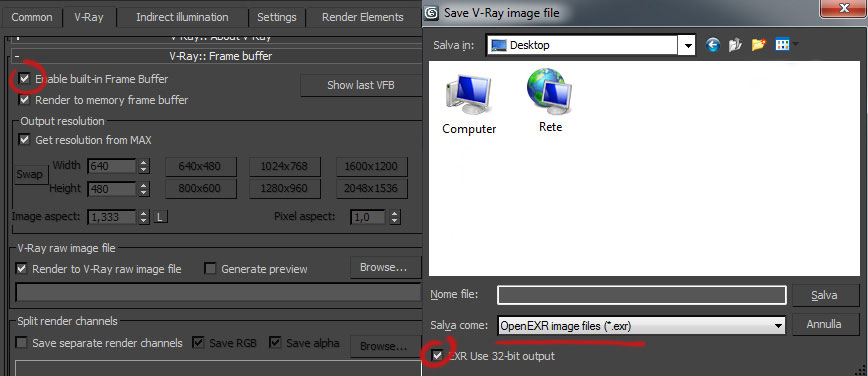
Now we have to render our scene in 32bit opeEXR file by using Vray Frame buffer under Vray tabs. Enable it and choose Render to V-Ray raw image file, then browse button and set where you want to render your file. Remember to save as openEXR and not in .vrimg and check EXR use 32-bit output.
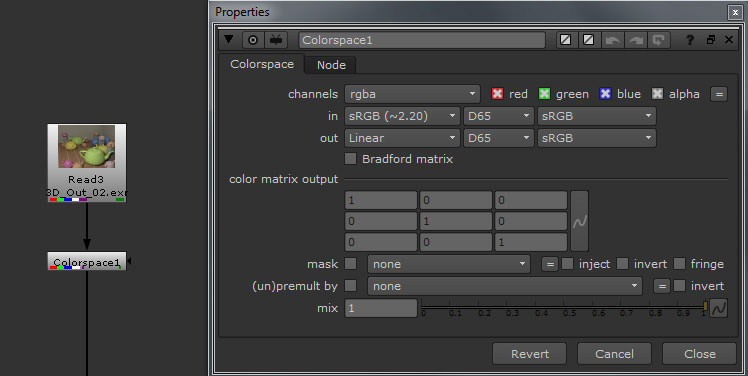
At this point, we can open our 32 bit in nuke. One imported we quickly notice that the color of the render is not the same of the frame buffer, and this for a specific reason a try to explain in few words.
The default color space of many programs adopt is sRGB (“s” stay for standard), this color space have a gamma of 2.2, which means it isn’t linear. So when you render in our case, the application generates a gamma-corrected render but we are going to save it in an openEXR file, and this particular file type is linear. So we have an sRGB render(gamma-corrected) stored in a full float linear file, here is our trouble. To solve this we can easily use a ColorSpace node to tell our input are sRGB, and we want to come out in linear. We could do the same by choose in read node the sRGB color space but I note that this clamp color information value.
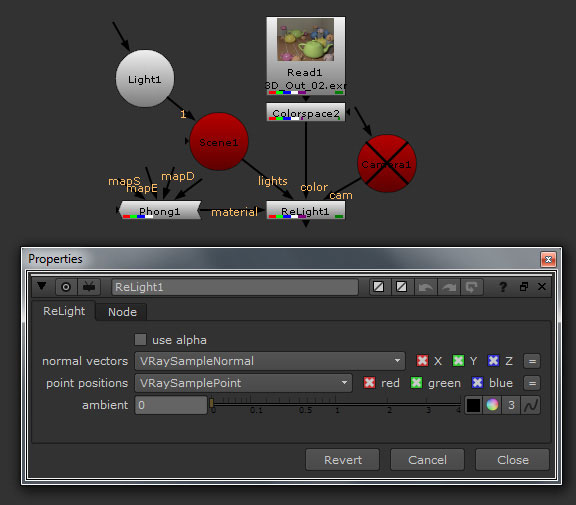
Now create a Relight node by going to “other nodes – All plugin – update”. Now you can see all plugin available on Nuke, so our relight node is under “other nodes – All plugin – R – ReLight”. Create a Scene, Light, Phong, and Camera nodes and connect all like the tree below. Initially, Relight has only color and light arrow, you need to drag others placed on the left of the gizmo, I hope the foundry shortly fix this bug for some nodes. Then disable your camera because isn’t necessary for now, but you must create it to find the material arrow on the left of ReLight node when you are connecting the tree. Set in Relight node normal vectors to VraySamplerNormal and point position to VraySamplerPoint.
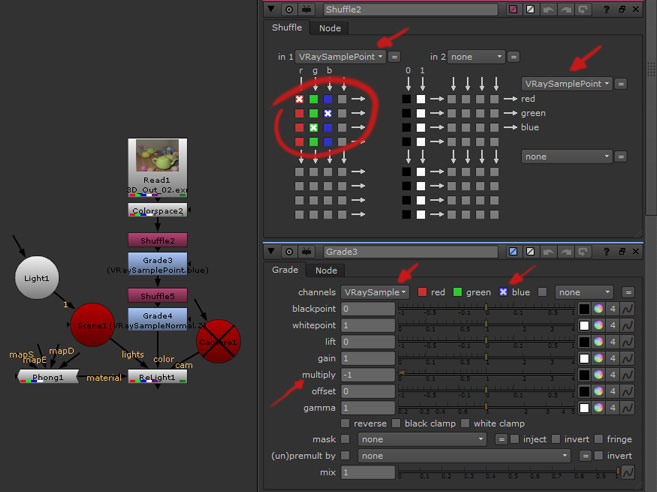
Now you can able to relight your scene correctly if 3d world coordinate are the same of Nuke, but in owr case it isn’t. So we need to swap the green and blue channels of both point and normal pass we have and then invert the blue channel result without clamp negative value. For this reason, the Invert node doesn’t work correctly because it changes 0 to 1, and 1 to 0. We need a math operation *-1 to make 0 to 0, 1 to -1, and -1 to 1.
To do that add one shuffle and one grade node to control each VraySamplerPoint and Normal Pass, and we are going to swap G and B channel in shuffle node, and invert only the blue channel. These operations you have to do for both channels identically. Below I show you only parameter to correct only the VraySamplePoint pass, do the same for the VraySamplerNormal:
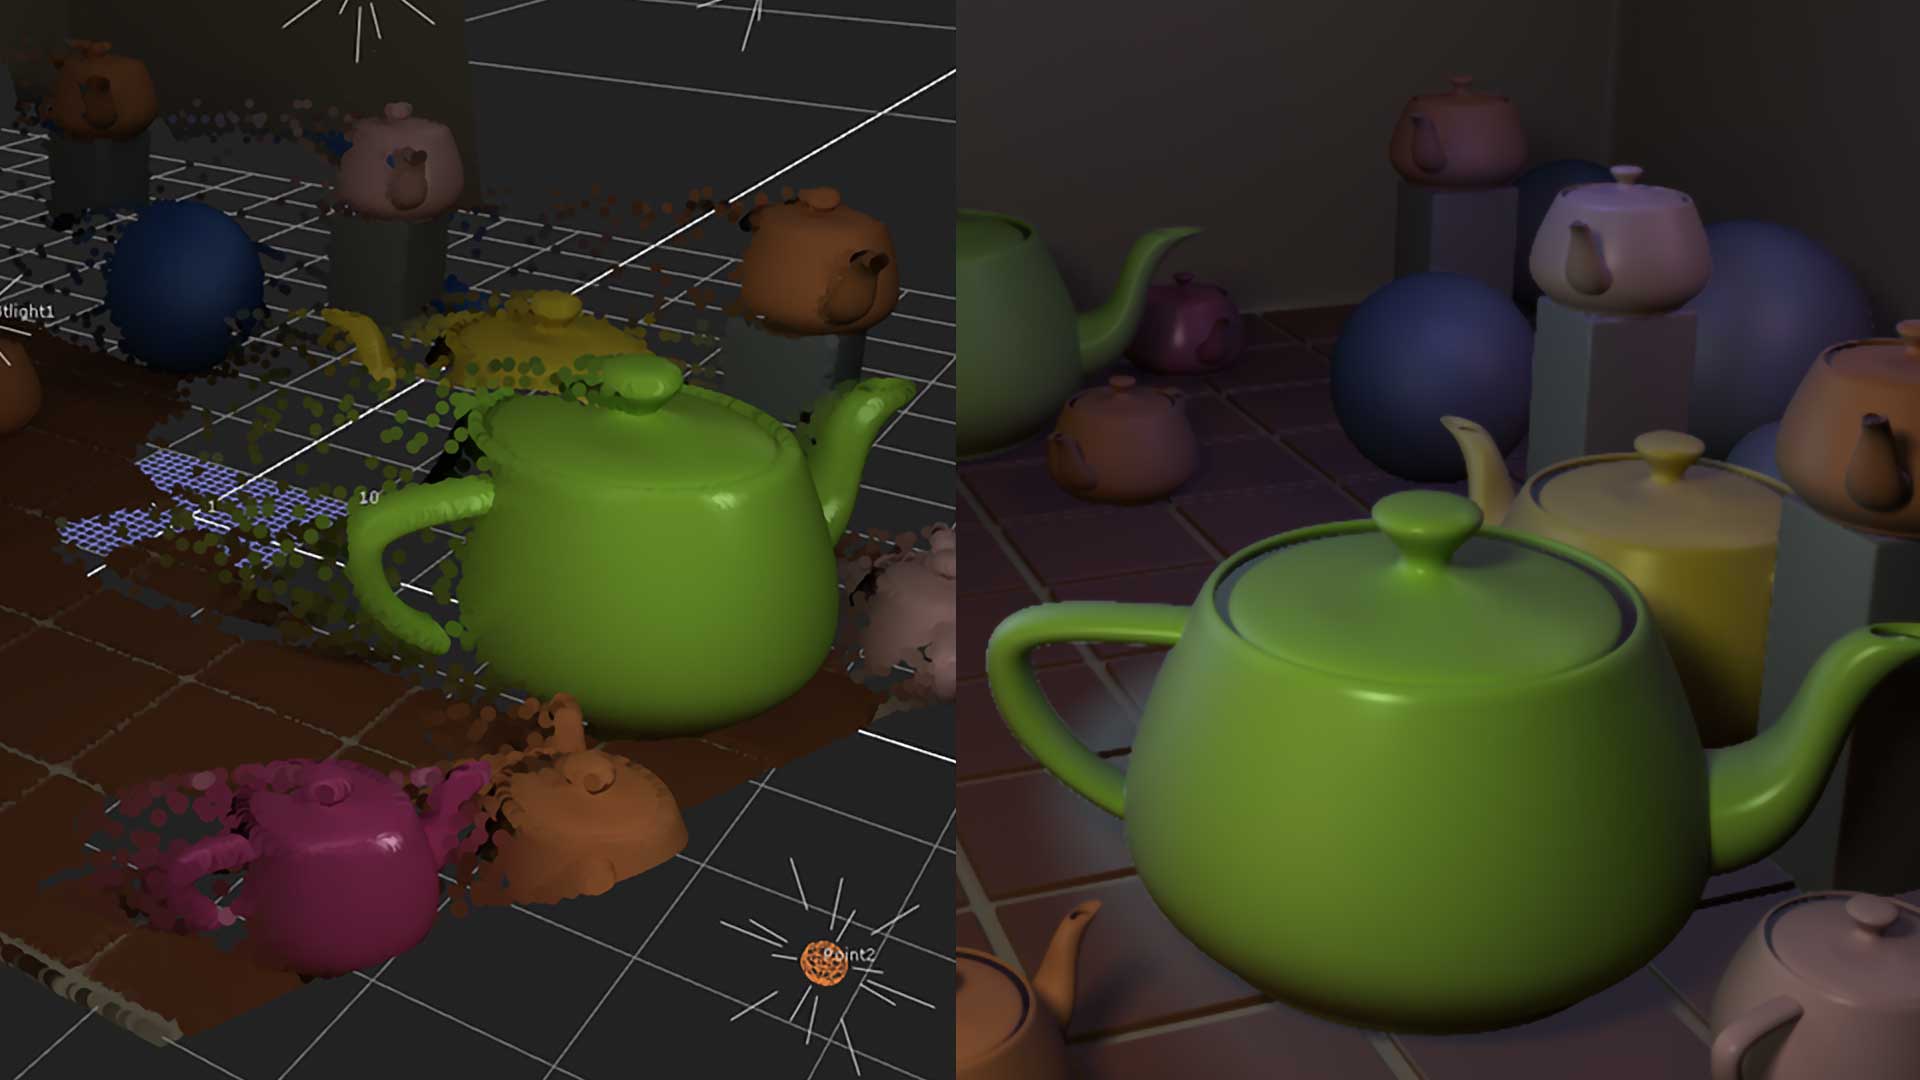
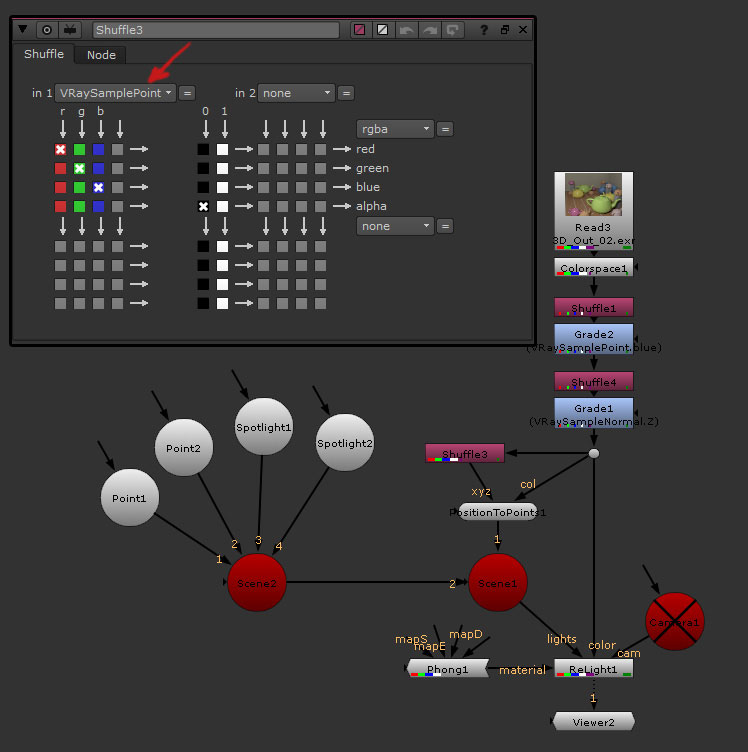
Only now our Relight node work correctly, but to complete this fantastic tool I like to add another node, the PositionToPoint node that help us to visualize in 3D workspace of Nuke our relighting process. Create an PositionToPoint node by going to “other nodes – All plugin – P – PositionToPoints” or press Tab and write PositionToPoints (I prefer) and connect to our tree like below, adding a shuffle node to output in rgb our VraySamplerPoint pass as I show below. So we have our final relighting node tree set properly:
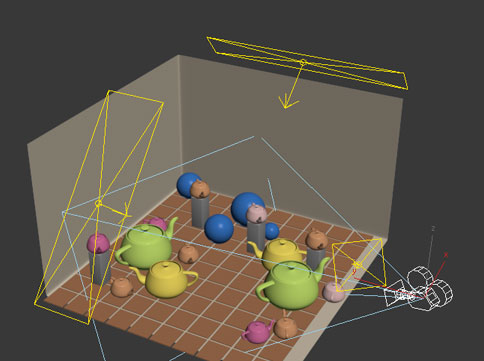
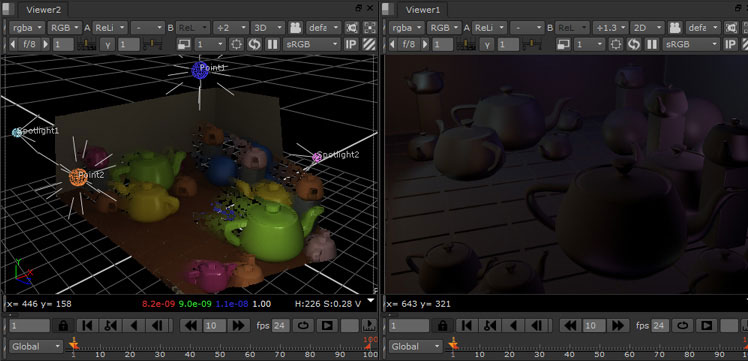
By viewing to PositionToPoint node now in 3D Nuke workspace we see the scene rendered in 3d studio max, so now we can add how many lights we want to reilluminate our scene and see the result of ReLight node give us:
This technique is very useful for many uses. Usually, I add this result with the initial image, this gives me the ability to fine-tuning my illumination of each element in my scene using multiple ReLight node and object select pass.
Anyway, if you want to try this tool quickly, or if you just want to have a fast template ReLight tree you can download this project here
If I missed/screwed up any information please let me know
I hope you find this tutorial useful.